Log #13 · Sep 27, 2026
How to Use a PIR Motion Sensor
How passive infrared sensors detect people, how to set the HC-SR501 sensitivity and delay knobs, and code for a motion-activated light.
A PIR (passive infrared) sensor is what turns on hallway lights when you walk past. It does not send out any signal; it simply watches for changes in the infrared heat coming from its field of view. The most common hobby module is the HC-SR501, a small board under a white dome. It needs no library, uses one digital pin and is easy to get working in ten minutes.
How it detects motion
Every warm object, including you, gives off infrared radiation. Inside the PIR module is a pyroelectric sensor split into two halves. When the room is still, both halves see the same amount of infrared and cancel out. When a warm body moves across the view, one half sees it before the other, the balance changes, and the module's circuit turns that change into a HIGH output.
The white dome is a Fresnel lens. It divides the room into many zones and focuses each onto the sensor, which extends the detection range to several meters and makes movement across the zones easy to notice.
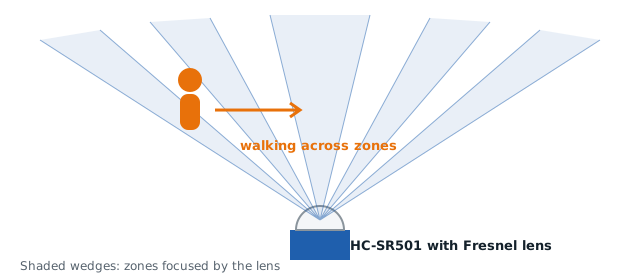
This explains a quirk worth remembering: a PIR sensor detects movement across its view much better than movement straight toward it. It also cannot see a person who is perfectly still.
The HC-SR501 at a glance
| Feature | Value |
|---|---|
| Supply voltage | 4.5–20 V (5 V works fine) |
| Output | 3.3 V HIGH when motion is detected |
| Range | Adjustable, up to about 7 m |
| Detection angle | About 110° |
| Hold time | Adjustable, about 3 s to 5 min |
| Warm-up time | Up to 60 s after power-on |
The 3.3 V output is read as HIGH by a 5 V Arduino and is also safe for 3.3 V boards like the ESP32.
The two knobs and the jumper
Flip the module over and you will find two orange potentiometers and a jumper.
- Sensitivity (Sx): turn clockwise to increase range, up to about 7 m. Counter-clockwise reduces it to around 3 m. Lower sensitivity cuts false triggers from pets or heaters.
- Time delay (Tx): how long the output stays HIGH after motion. Fully counter-clockwise is about 3 seconds, which is easiest while testing; let your code handle longer timing.
- Trigger jumper: in H (repeat) mode, continued movement keeps the output HIGH. In L (single) mode, the output drops after the delay even if movement continues. Use H for lighting.
Board layouts vary between manufacturers, so check the silkscreen labels on yours.
Wiring
| HC-SR501 pin | Arduino Uno |
|---|---|
| VCC | 5 V |
| OUT | Pin 2 |
| GND | GND |
Code: a motion-activated light
This sketch turns on an LED for 10 seconds after the last movement. It uses millis() instead of delay(), so the timer restarts every time motion continues.
const int PIR = 2;
const int LIGHT = 13;
const unsigned long ON_TIME = 10000;   // 10 s after last motion

unsigned long lastMotion = 0;
bool lightOn = false;

void setup() {
  pinMode(PIR, INPUT);
  pinMode(LIGHT, OUTPUT);
  Serial.begin(9600);
  Serial.println("Warming up PIR...");
  delay(30000);                         // let the sensor settle
  Serial.println("Ready");
}

void loop() {
  if (digitalRead(PIR) == HIGH) {
    lastMotion = millis();
    if (!lightOn) { Serial.println("Motion detected"); }
    lightOn = true;
  }
  if (lightOn && millis() - lastMotion > ON_TIME) {
    lightOn = false;
    Serial.println("No motion, light off");
  }
  digitalWrite(LIGHT, lightOn ? HIGH : LOW);
}
To switch a real lamp, replace the LED with a relay module rated for your mains voltage, and keep all mains wiring in a closed enclosure. If you are not confident with mains electricity, use a low-voltage LED strip instead.
Avoiding false triggers
- Allow the warm-up. For the first 30 to 60 seconds the output toggles randomly while the sensor stabilizes.
- Keep it away from heat sources such as heaters, radiators and sunny windows. Sudden sunlight or warm drafts look like motion.
- Power it cleanly. Noise from motors or relays on the same supply can cause phantom triggers. A 100 µF capacitor across its VCC and GND pins helps. Our powering guide covers separate supplies for motors.
- Mask the lens with tape to narrow the field of view if it sees an area you want to ignore.
PIR or ultrasonic?
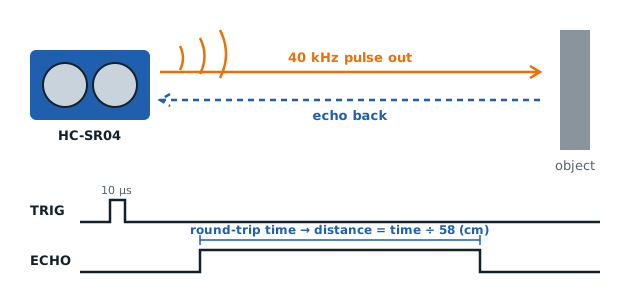
A PIR sensor tells you that something warm moved. An ultrasonic sensor tells you how far the nearest object is, warm or not. For presence detection with very low power, choose PIR; the HC-SR501 draws only about 65 µA while idle. For robots and distance measuring, choose ultrasonic. Some security projects combine both: the PIR wakes the system and the ultrasonic confirms the distance.
— TheSolderBench · found a mistake? tell me