Log #09 · Sep 27, 2026
Debugging Arduino Code with the Serial Monitor
Print values, trace program flow, read commands from your computer and use the Serial Plotter to find bugs in Arduino sketches faster.
When a sketch does not behave, the first question is always "what is the board actually seeing?" The Serial Monitor answers it. It is a window in the Arduino IDE that shows text your board sends over the USB cable, and it can send text back. Learning to use it well turns guesswork into debugging. This guide covers printing values, tracing your program, reading commands and plotting live data.
Starting serial communication
Every sketch that talks to the Serial Monitor starts with one line in setup():
void setup() {
  Serial.begin(9600);   // bits per second, called the baud rate
}
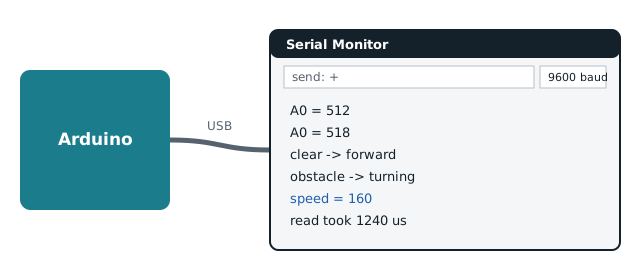
Then open Tools → Serial Monitor and make sure the baud rate dropdown in the corner shows the same number. If the two do not match, you see random symbols instead of text. 9600 is the classic default; 115200 is faster and common on newer boards.
Printing values
Serial.print() sends text without a new line and Serial.println() ends with a new line.
void loop() {
  int raw = analogRead(A0);
  Serial.print("A0 = ");
  Serial.println(raw);
  delay(250);
}
Useful formatting options:
Serial.println(3.14159, 3)prints a float with 3 decimals.Serial.println(42, BIN)prints binary, handy when working with registers or bit flags.Serial.println(255, HEX)prints hexadecimal.
Always add a label in front of each value. Five unlabeled columns of numbers are almost as confusing as no output at all.
Tracing program flow
Many bugs are not wrong values but code that never runs, or runs at the wrong time. Add short messages at key points:
void loop() {
  float d = readDistanceCm();
  if (d < 25) {
    Serial.println("obstacle -> turning");
    turnLeft();
  } else {
    Serial.println("clear -> forward");
    forward();
  }
}
If you never see "obstacle", the condition is never true, so check what d really contains. This technique quickly finds the classic mistakes: a comparison written backwards, a variable that never updates, or a function that returns early.
Timing how long code takes
millis() and micros() let you measure how long a piece of code takes:
unsigned long t0 = micros();
float d = readDistanceCm();
Serial.print("read took ");
Serial.print(micros() - t0);
Serial.println(" us");
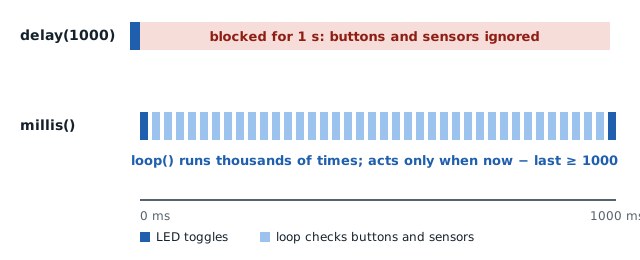
This is useful when a loop feels sluggish. A sensor read that blocks for 30 ms, like an ultrasonic sensor waiting for a missing echo, can slow down everything else.
Reading commands from your computer
The Serial Monitor can send text to the board too. Type into the box at the top and press Enter. This lets you change settings without re-uploading:
int speed = 150;

void loop() {
  if (Serial.available()) {
    char c = Serial.read();
    if (c == '+') speed += 10;
    if (c == '-') speed -= 10;
    speed = constrain(speed, 0, 255);
    Serial.print("speed = ");
    Serial.println(speed);
  }
  // ... use speed to drive the motors
}
For numbers, Serial.parseInt() reads a whole integer from the incoming text. Set the line-ending dropdown to "Newline" so each command is clearly finished. This approach is excellent for tuning PID gains on a running robot.
The Serial Plotter
Tools → Serial Plotter draws your numbers as live graphs instead of text. Print values separated by commas or spaces, one set per line:
Serial.print("setpoint:");
Serial.print(20);
Serial.print(",distance:");
Serial.println(distanceCm);
The name:value format gives each line a label in the legend. Watching a sensor or a control loop on a graph makes noise, spikes and oscillation obvious in a way that scrolling numbers never will.
Things that trip people up
- Nothing appears: check the port under Tools → Port, and remember that some boards reset when the monitor opens, so wait a second.
- Garbled symbols: the baud rates do not match.
- Upload fails while the monitor is open: on some systems another program, like a second IDE window, is holding the port. Close it.
- Sketch runs slower with prints: printing takes time. At 9600 baud, sending about 1000 characters takes roughly one second. Raise the baud rate or print less often.
- Pins 0 and 1 behave oddly: they carry the serial data on Uno and Nano boards, as covered in our pins guide. Keep other hardware off them while using serial.
Clean up when you are done
Debug prints are meant to be temporary. A neat trick is to wrap them so you can turn them all off at once:
#define DEBUG 1
#if DEBUG
  #define DBG(x) Serial.println(x)
#else
  #define DBG(x)
#endif
Use DBG("clear -> forward"); in your code. Set DEBUG to 0 when the project is finished, and all the debug lines disappear from the compiled program.
— TheSolderBench · found a mistake? tell me