Log #31 · Sep 27, 2026
How to Solder: A Beginner's Guide
Tools, temperature, the five-second joint technique, how to spot bad joints and how to desolder mistakes, explained for your first soldering session.
Breadboards are great for experiments, but sooner or later you will want a project that does not fall apart when you pick it up. That means soldering. It looks tricky, yet the core technique takes about an hour to learn. This guide covers what to buy, how a good joint forms and the mistakes to avoid on your first board.
What solder actually does
Solder is a metal alloy that melts at a relatively low temperature. When you heat two metal parts, such as a component lead and a copper pad, and melt solder onto them, it flows over both surfaces and bonds with them as it cools. The result is an electrical and mechanical connection. Solder is not glue: it only bonds to metal that is hot enough and clean. Almost every bad joint breaks one of those two rules.
What you need
- Temperature-controlled soldering iron or station. Cheap fixed-temperature irons make learning harder.
- Solder: 0.6–0.8 mm diameter with a flux core. Leaded 60/40 or 63/37 flows easily and melts around 183–190 °C. Lead-free (SAC305) melts around 217–220 °C and is required in many commercial products.
- Brass wool tip cleaner or a damp sponge.
- Flux pen: extra flux fixes many stubborn joints.
- Flush cutters to trim leads.
- Helping hands or a PCB holder.
- Safety glasses. Clipped leads fly, and flux can spit.
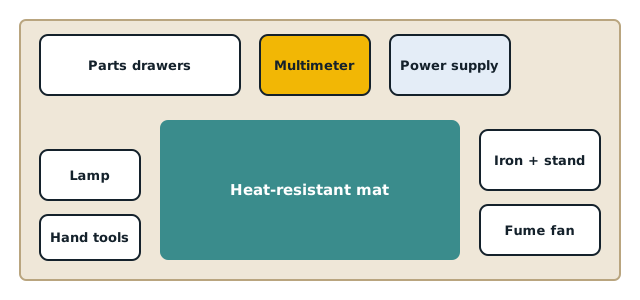
Our full bench tools list covers what else is worth having.
Temperature
For leaded solder, start around 330 °C. For lead-free, around 350–370 °C. Too cold and the solder turns pasty and dull. Too hot and the flux burns off instantly, the tip oxidizes and pads can lift off the board. A small tip on a large ground pad may need more heat; a bigger tip is usually a better fix than a higher temperature.
The technique
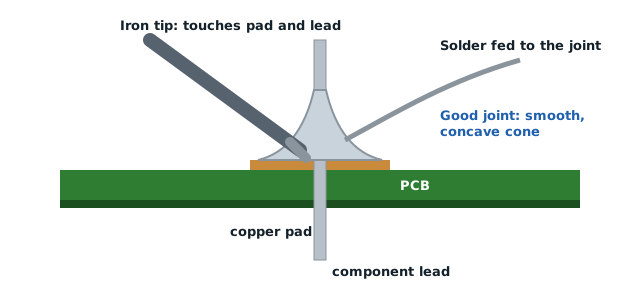
- Tin the tip. Melt a little solder onto the clean tip so it is shiny. A tinned tip transfers heat far better.
- Place the component and bend its leads slightly outward so it stays put.
- Heat the joint. Touch the tip so it contacts both the pad and the lead at the same time. Hold for one to two seconds.
- Feed solder to the joint, on the side opposite the iron, not onto the iron itself. The hot metal melts it and it flows around the lead.
- Stop feeding once the pad is covered and a small cone has formed, usually after one or two seconds.
- Remove the solder first, then the iron. Keep the part still for a couple of seconds while it cools.
- Trim the lead just above the joint.
The whole joint should take about 3 to 5 seconds. If it takes much longer, the tip is dirty, too small or too cool.
Good joints and bad joints
| Joint | Looks like | Cause | Fix |
|---|---|---|---|
| Good | Shiny (leaded), smooth concave cone, pad fully covered | Correct heat and amount | Nothing to do |
| Cold | Dull, lumpy, grainy | Not enough heat, or parts moved while cooling | Reheat with a touch of flux |
| Blob | Ball of solder sitting on top | Solder melted on the iron, pad not hot | Reheat pad and lead together |
| Too little | Pad not fully covered, gap around lead | Not enough solder | Add a little more |
| Bridge | Solder joining two neighboring pads | Too much solder | Drag the iron away, or use wick |
Lead-free joints look a little duller than leaded ones even when they are good, so judge by shape: smooth and concave is right.
Fixing mistakes: desoldering
- Solder wick (braid): lay the copper braid on the joint and press the iron on top. The braid soaks up the molten solder. Add flux if it is slow.
- Solder sucker (desoldering pump): cock it, melt the joint, place the nozzle and press the button to vacuum the solder away.
Heat the pad for no more than a few seconds at a time. Repeated long heating can lift the copper pad off the board.
A good first practice project
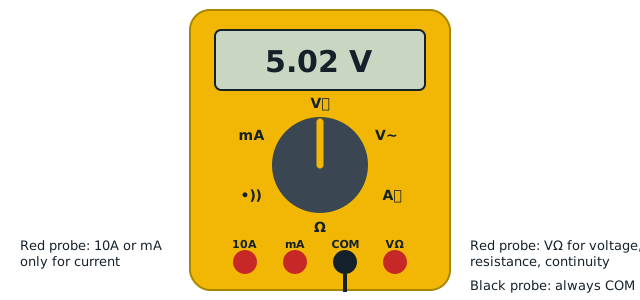
Buy a cheap practice kit, like a flashing-LED badge, or a piece of perfboard with some resistors and header pins. Solder 20 or 30 joints before working on anything important. Check each one with a magnifier, and test continuity with a multimeter as shown in how to use a multimeter.
Safety
- The tip is around 350 °C. Always return the iron to its stand.
- Work in a ventilated space and keep your face out of the flux smoke. A small fume extractor fan helps.
- Wash your hands after handling leaded solder, and do not eat at the bench.
- Keep a fire-safe surface under your work, such as a silicone mat.
With a few practice joints done, you are ready to turn a breadboard circuit into a permanent build, like the OLED digital thermometer.
— TheSolderBench · found a mistake? tell me