Log #87 · Oct 26, 2026
Arduino Starter Kit Guide: What's Inside and What to Learn First
What the parts in a typical Arduino starter kit are, what each one is for, a sensible order to learn them in, how to choose a kit, and the extra tools no kit includes.
You've opened an Arduino starter kit and there are dozens of little bags of parts, many with no labels. Or you're about to buy one and the listings all claim "200+ pieces". This guide explains what the common parts are, which ones matter, a good order to learn them in, and what to look for when buying.
What a typical kit contains

The essentials (you'll use these constantly):
| Part | What it's for | Start here |
|---|---|---|
| Arduino Uno (often a clone) | the brain | Which Arduino to buy |
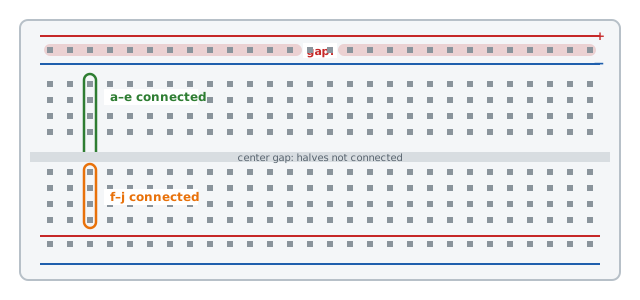
| Breadboard and jumper wires | building circuits without soldering | Breadboard basics |
| LEDs and resistors | your first outputs | Choosing a resistor for an LED |
| Push buttons | your first inputs | Reading a push button |
| Potentiometers | adjustable input knobs | Potentiometer and joystick |
Sensors:
| Part | What it measures | Guide |
|---|---|---|
| HC-SR04 ultrasonic | distance | Ultrasonic sensors |
| DHT11 | temperature and humidity | DHT11 and DHT22 |
| LDR (photoresistor) | light | Light sensors |
| PIR module | motion | PIR motion sensor |
| IR receiver + remote | remote control | IR remote |
| Joystick module | two-axis input | Potentiometer and joystick |
Outputs and actuators:
| Part | What it does | Guide |
|---|---|---|
| SG90 servo | moves to an angle | Control a servo |
| 28BYJ-48 + ULN2003 | precise slow rotation | 28BYJ-48 stepper |
| Buzzer (active or passive) | beeps and tones | used in the reaction-time game |
| Relay module | switches bigger loads | Relay modules |
| 16x2 LCD | shows text | 16x2 LCD with I²C (many kits ship it without the I²C backpack; that version needs 6+ wires and the LiquidCrystal library) |
Parts you may also find: a 7-segment display, an 8×8 LED matrix, a 74HC595 shift register, an RFID reader (see the RFID door lock), a 4×4 keypad, a tilt switch, a small DC motor and a 9 V battery clip.
Active vs passive buzzer
Kits often include both, and they look almost the same:
- Active buzzer: beeps by itself when powered. Often has a sealed bottom and a sticker on top. Use
digitalWrite(). - Passive buzzer: needs a changing signal to make sound, so it can play different notes. Often shows a green circuit board underneath. Use
tone().
Connect each to 5 V and GND briefly (+ or the longer leg to 5 V): the one that beeps on its own is the active one.
A sensible learning order
- Blink an LED: your first sketch.
- Buttons and inputs: digital reads, pull-ups, debouncing.
- Potentiometer and analog inputs: analogRead explained.
- PWM: dim an LED, see PWM explained.
- Serial Monitor debugging: debugging with the Serial Monitor.
- Sensors: ultrasonic, DHT11, LDR.
- Displays: the 16x2 LCD.
- Movement: servo, then stepper.
- First project combining them: a parking sensor or traffic light.
Learning millis() instead of delay() around step 5 makes every later project easier.
How to choose a kit
- Read the parts list, not the piece count. "200 pieces" often means 150 resistors and jumper wires. Look for the modules above.
- Board: clones with the CH340 USB chip work fine; Windows may need the free CH340 driver.
- Tutorials: good kits include a downloadable PDF or code for each part. Check reviews mention it.
- Breadboard size: a full-size (830 points) breadboard is much more comfortable than the tiny ones.
- Storage box: a box with labeled compartments saves a lot of frustration.
What no kit includes (but you'll want)
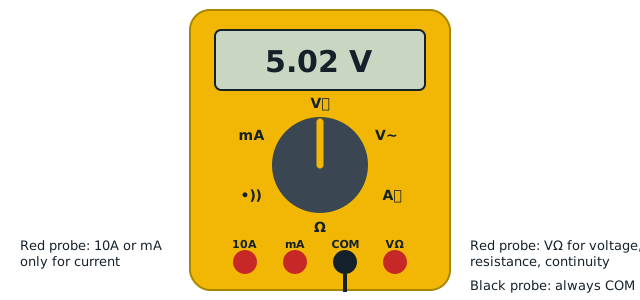
- A multimeter, the most useful tool after the Arduino itself: how to use a multimeter.
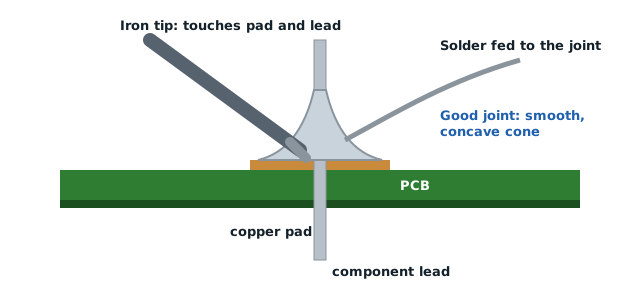
- A soldering iron, once your projects leave the breadboard: choosing a soldering iron.
- A separate power supply for motors and servos: how to power an Arduino project.
- Extra jumper wires: you never have enough.
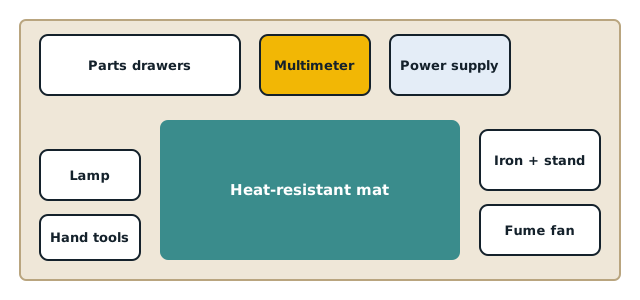
The rest of a good workspace is covered in electronics bench tools.
Identifying unlabeled parts
- Resistors: read the color bands, see resistor color codes, or measure them with a multimeter.
- Capacitors: the value is printed on them; see choosing capacitors.
- Modules: the chip name printed on the board (e.g. PCF8574, ULN2003, LM393) tells you what it is. Search that name with "Arduino".
— TheSolderBench · found a mistake? tell me